This post is also available in other languages:
Content Reuse Policy
You may reproduce or adapt this content for educational or commercial use with proper attribution and a link to: the original blog post Include a visible credit near the reused content with a standard hyperlink to the source.
VLAND CANBUS & Hyper-Flash Fixes (2025): Stop Bulb-Out Warnings, Fast Blinking & DRL Flicker
A practical VLAND guide to solve CANBUS issues: fix hyper-flashing, bulb-out warnings, and DRL flicker using resistors/decoders, LED flashers, or BCM coding. Includes step-by-step wiring, a troubleshooting flow, and pro tips.
VLAND CANBUS & Hyper-Flash Fixes (2025): Stop Bulb-Out Warnings, Fast Blinking & DRL Flicker
This VLAND EU guide explains why CANBUS errors happen after LED upgrades and shows proven fixes: load resistors/decoders, LED-compatible flasher relays, or coding your BCM. We also cover DRL/PWM flicker, front + rear LED scenarios, and a step-by-step troubleshooting flow.
Symptoms: What You Might See
- Hyper-flashing (rapid blink) on one or both turn signals.
- Bulb-out warnings on the dash even though LEDs light up.
- DRL or parking lamp flicker, especially with engine on (PWM).
- Intermittent issues: works on hazards but not on turns, or only in cold/with specific loads.
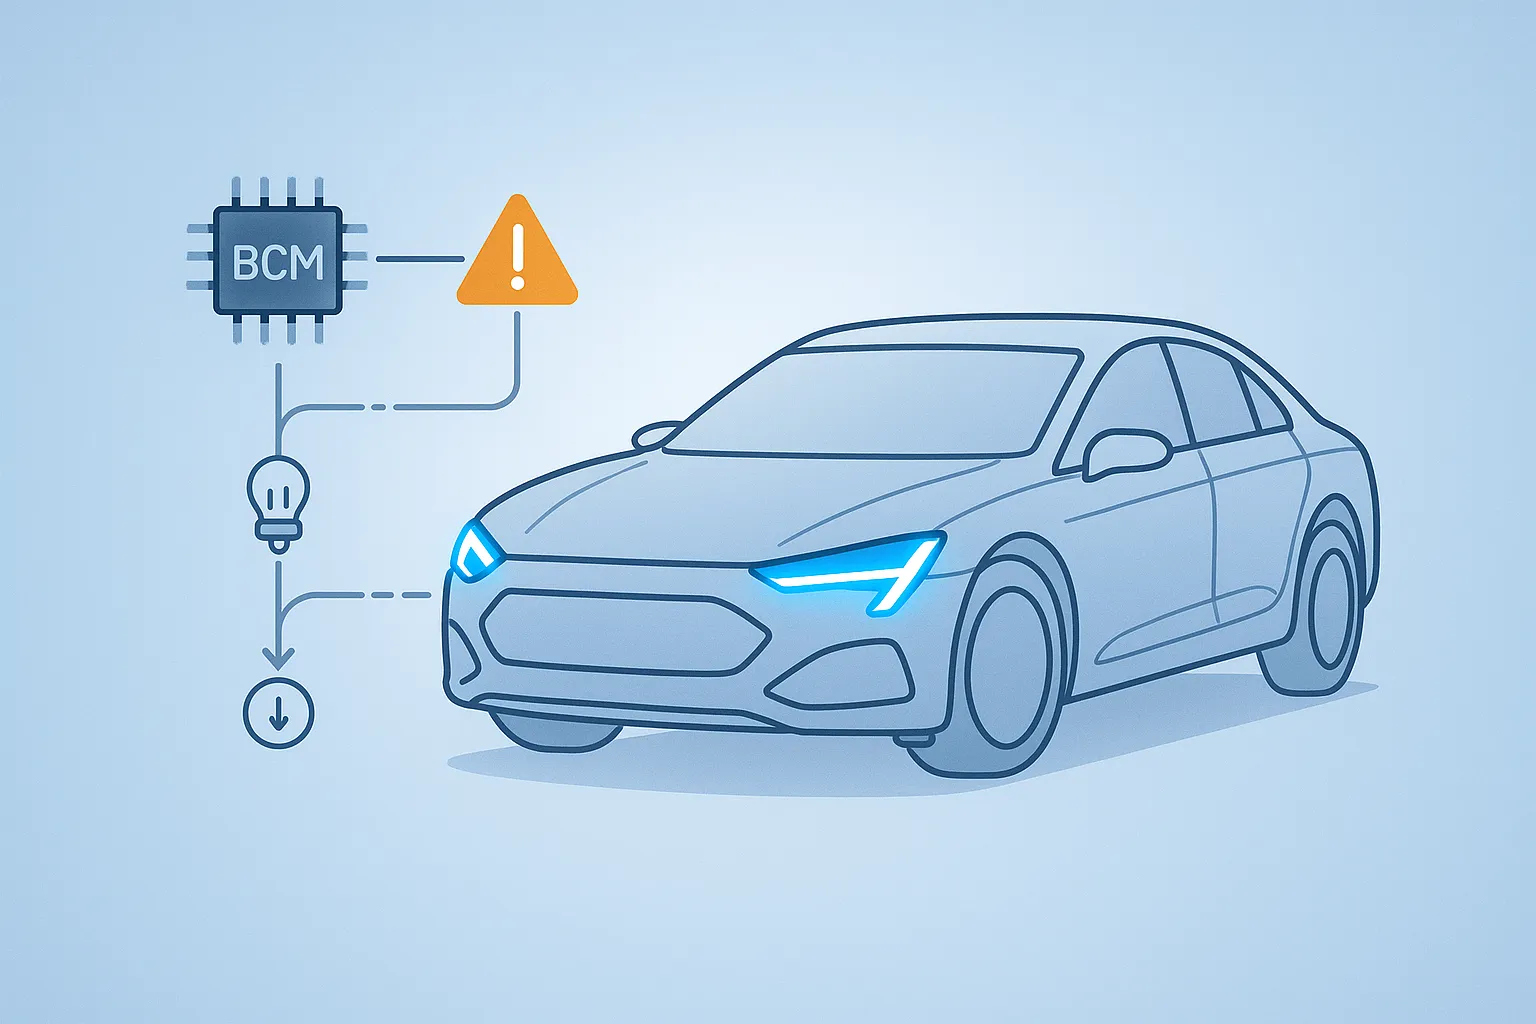
Why It Happens (CANBUS, Load & PWM)
LEDs draw far less current than halogen bulbs. Many vehicles monitor circuit load; when the draw is too low, they trigger a bulb-out warning and speed up the flasher (hyper-flash). Some cars also send diagnostic pulses or PWM (for DRLs/dimming) that can make LEDs flicker. VLAND LEDs are plug-and-play mechanically; electrically, your vehicle may still need a load fix (resistor/decoder), an LED flasher (older cars), or coding (modern BCMs).
Fix Paths at a Glance
Load Resistors / Decoders
Add a parallel resistor or plug-in decoder per circuit to simulate bulb load and (decoders) smooth PWM.
LED Flasher Relay
On vehicles with a replaceable flasher, swap to an LED-compatible unit (no resistors needed).
BCM Coding
Where supported, code lamp type to LED or disable bulb-out checks. Cleanest long-term fix.
Stop Hyper-Flash: Step-by-Step
- Identify circuits: Are front, rear, or both turn signals now LED (VLAND)?
- Choose a fix: Resistors/decoders (simple), LED flasher (older cars), or BCM coding (modern cars).
- Install resistor (parallel): One resistor per side across turn + and ground. Mount to metal; avoid plastic.
- Test: Ignition on, indicators left/right, hazards, then engine on. Confirm normal blink and no warnings.
- Tidy up: Secure modules, verify loom strain relief, reassemble trims.

Tip: If your vehicle uses a replaceable flasher relay, a plug-in LED flasher fixes hyper-flash without resistors.
Fix DRL / Parking Flicker (PWM)
- Decoder module: Use a CANBUS decoder with capacitor to smooth PWM on DRL/park circuits.
- Coding (when available): Disable “cold/warm bulb check” or set lamp type to LED for DRL/parking outputs.
- Dedicated DRL feed: Follow VLAND instructions for fuse-tap DRL power when required.
Front + Rear LEDs: Getting Load Right
If both front and rear indicators are LED (e.g., VLAND headlights and tails), ensure each side’s total load meets the vehicle’s expectation. Often one resistor per side (on the rear) is enough; some platforms monitor front/rear separately and may need both.
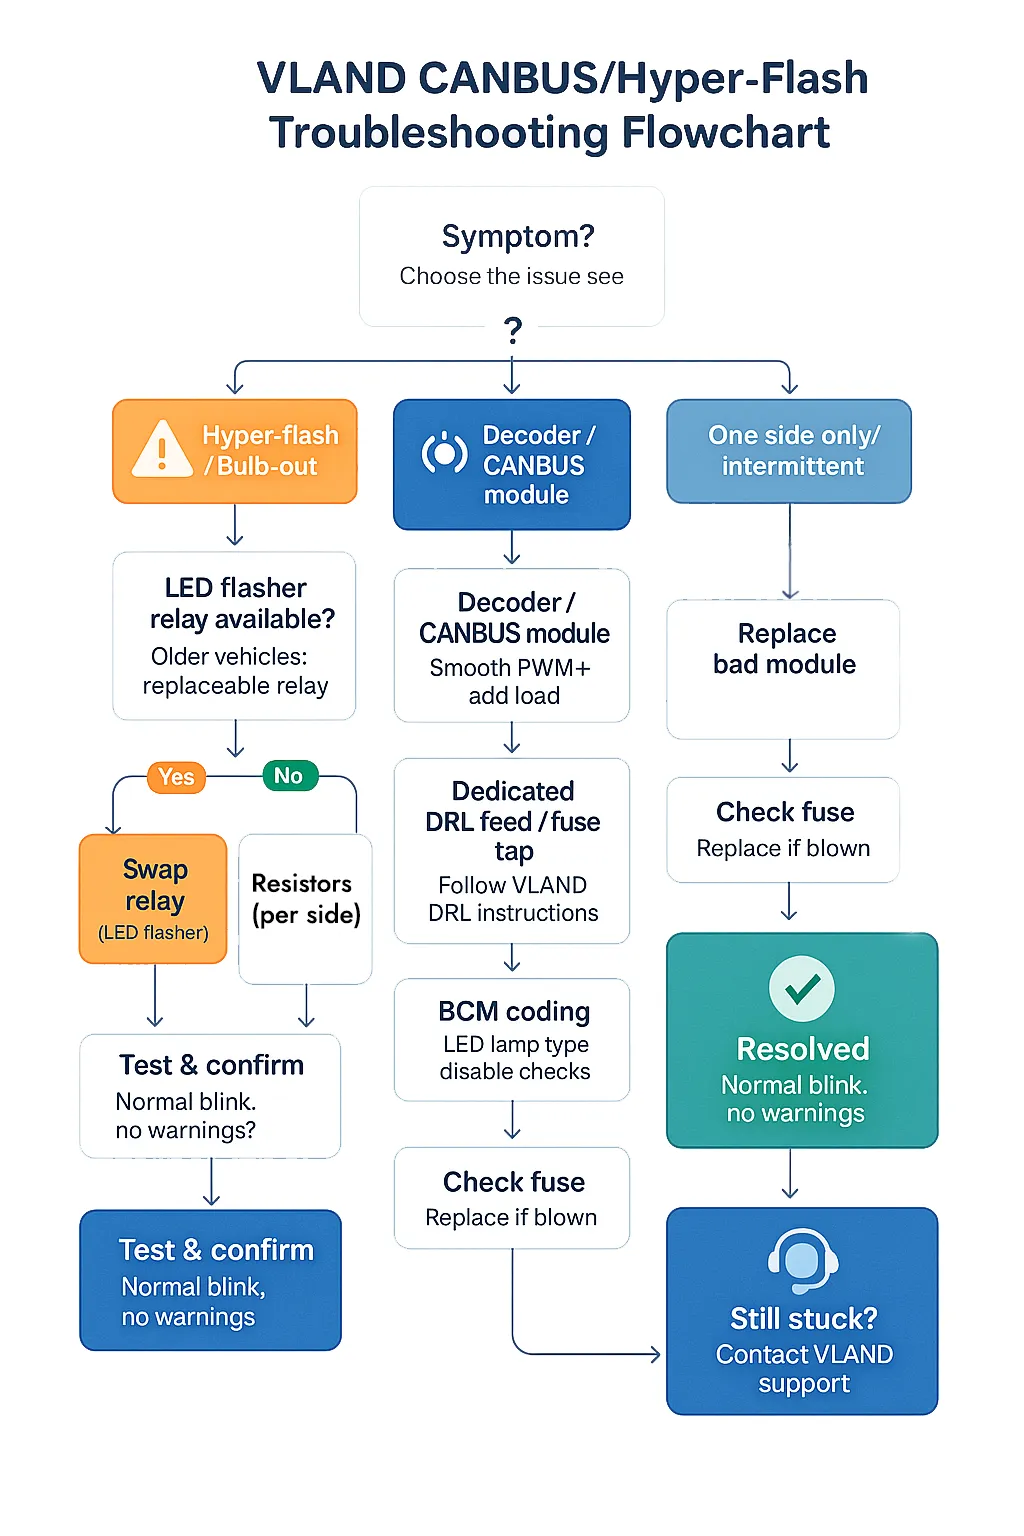
Troubleshooting Flow
Pro Tips & Safety
- Mount resistors on metal (they get hot). Keep away from plastic/loom.
- Solid grounds: A weak ground = weird behavior. Clean metal, tight fasteners.
- Polarity matters: If a 2-pin plug doesn’t light, flip it.
- Test before reassembly: Turns, hazards, brakes, DRL/parking — engine on and off.
- Use the right fix: LED flasher (older cars), coding (newer cars), or resistors/decoders (universal).
FAQs
Do VLAND lights always need resistors?
Where should I place a resistor — front or rear?
Will coding remove the startup/sequential animations?
My DRL flickers with the engine on — resistor or decoder?
Do I need to code both front and rear to LED?
More help from VLAND
© VLAND EU — Genuine VLAND products with clear, helpful guidance. More articles.
