This post is also available in other languages:
Content Reuse Policy
You may reproduce or adapt this content for educational or commercial use with proper attribution and a link to: the original blog post Include a visible credit near the reused content with a standard hyperlink to the source.
VLAND Headlight Aiming (2025): The 1% Rule for a Crisp, Non-Glare Cutoff
Learn the VLAND 1% headlight aiming method: quick setup, precise wall marks, and step-by-step adjustments for a sharp, non-glare cutoff. Includes 25 ft / 7.6 m guidance and pro tips for RHD/LHD, lowered cars, and post-install checks.
VLAND Headlight Aiming (2025): The 1% Rule for a Crisp, Non-Glare Cutoff
This VLAND EU guide shows you how to set a clean, glare-free cutoff using the simple 1% rule and a 25 ft / 7.6 m wall method. Perfect after installing VLAND headlights, changing ride height, or whenever you want maximum clarity without blinding others.
Why Headlight Aim Matters
Even the best VLAND projectors won’t perform correctly if the cutoff is too high or too low. Proper aim improves contrast and reach without glare, reduces flashes from oncoming traffic, and helps you pass inspections with fewer headaches.
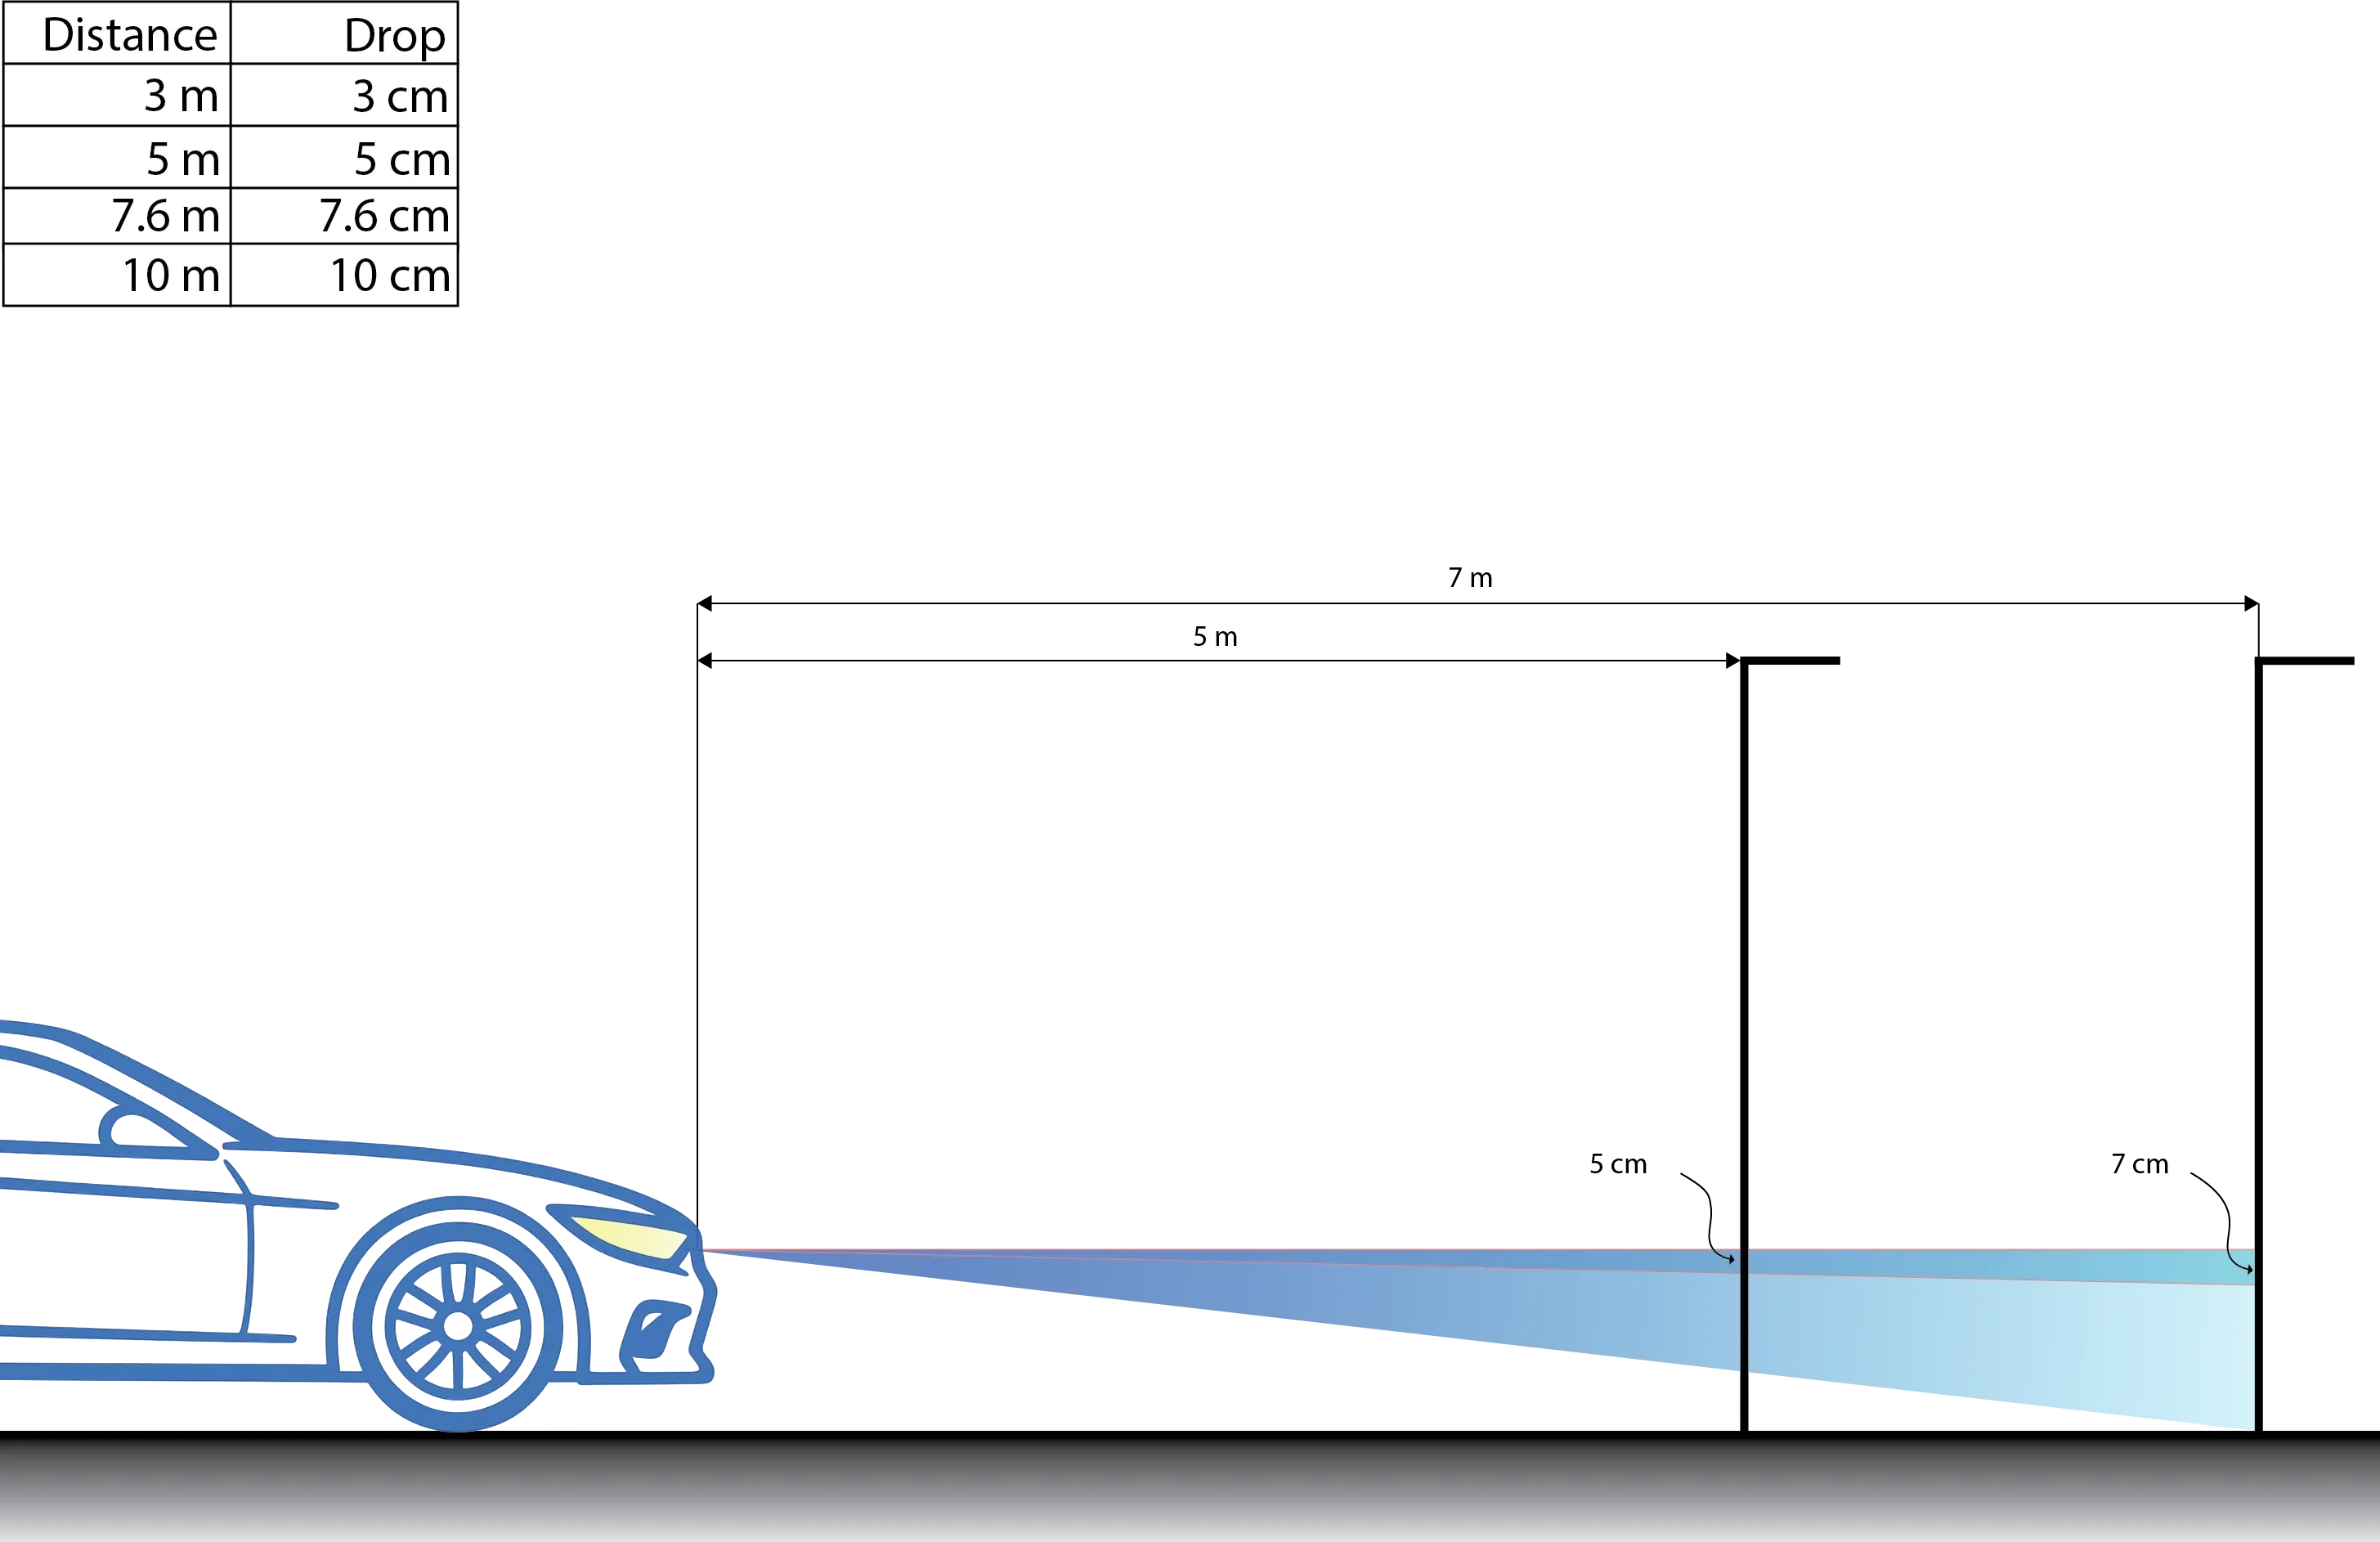
The VLAND 1% Rule (Concept)
Measure your headlamp center height (H) from the ground. At a distance D from a wall, set the low-beam cutoff to land Δ = D × 1% below the horizontal line at height H.
- 3 m → 3 cm drop (≈ 1.2 in)
- 5 m → 5 cm drop (≈ 2.0 in)
- 7.6 m / 25 ft → 7.6 cm drop (≈ 3.0 in)
- 10 m → 10 cm drop (≈ 3.9 in)
Inspection stations use beam testers; the 1% rule is a dependable pre-check to eliminate obvious glare.
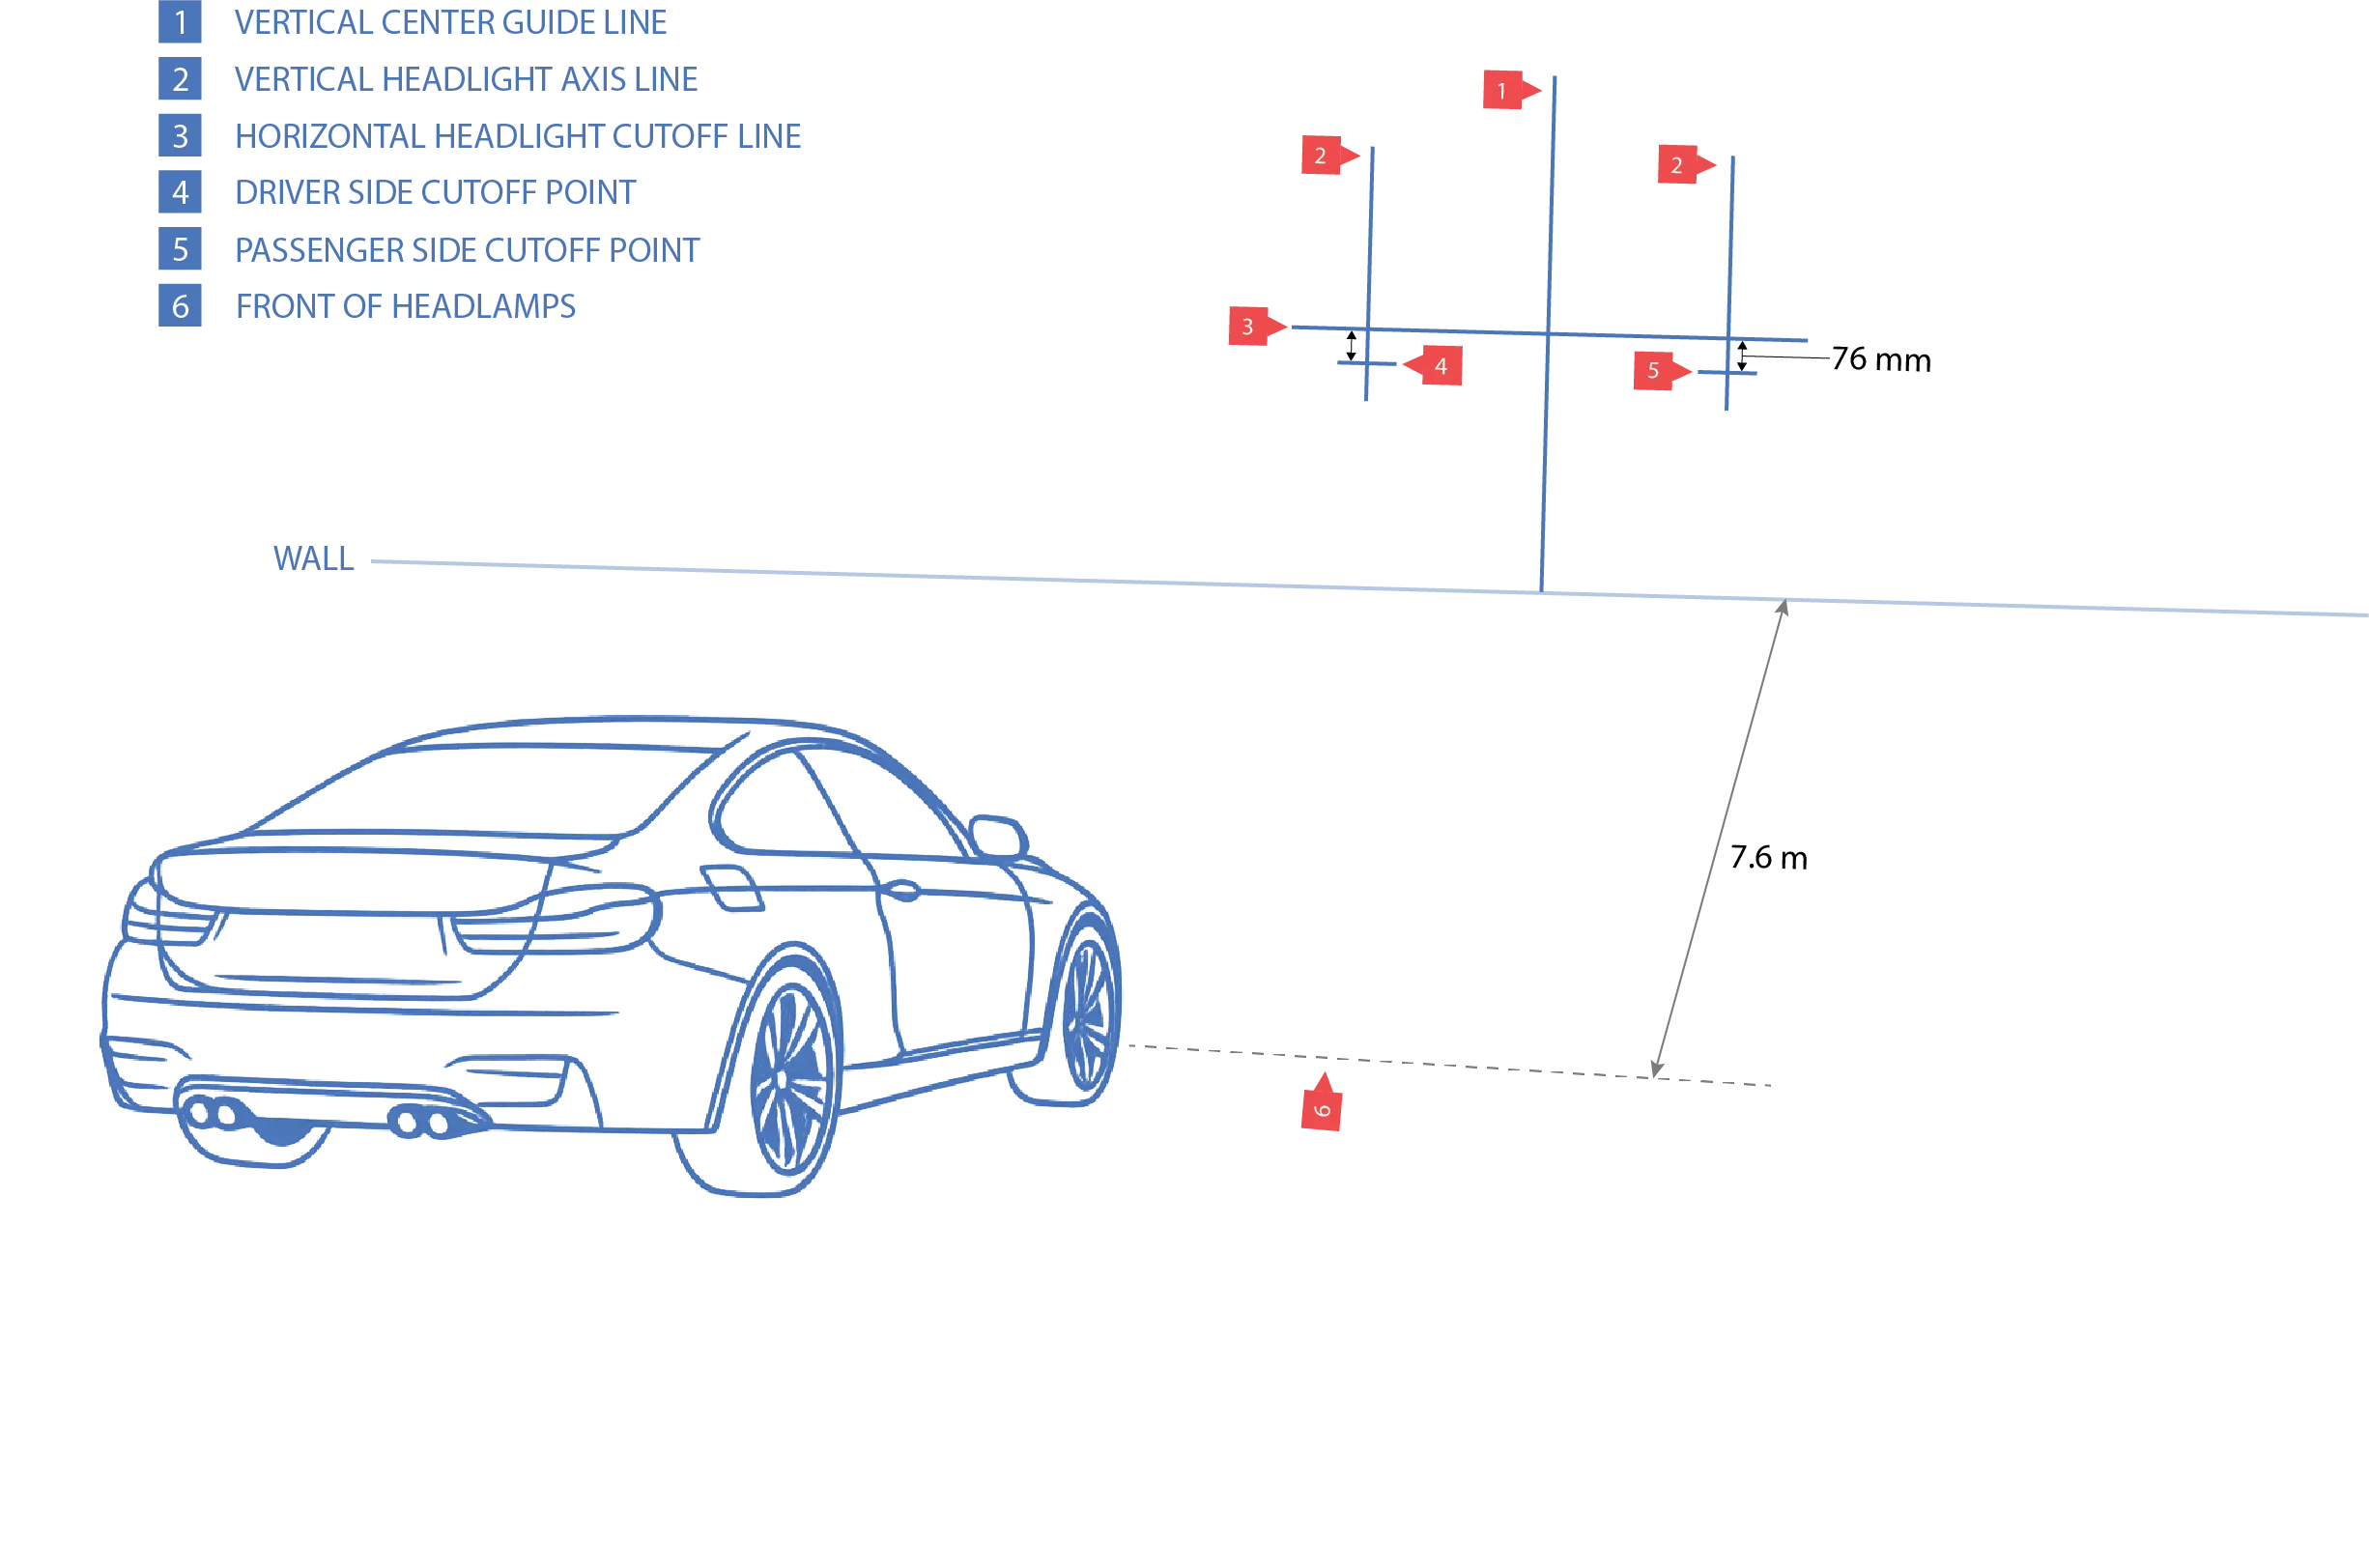
Setup & Measurements
- Level ground: Aim on a flat surface facing a flat wall.
- Tyre pressure & load: Normal pressure, typical fuel, usual cargo; driver in seat if possible.
- Distance: Measure exactly 25 ft / 7.6 m bumper to wall.
- Measure H: Ground → center of each low-beam projector/lens.
- Tape marks: Run a horizontal tape at H, then another tape 3 in / 7.6 cm below (this equals 1% at 25 ft). Add vertical lines for vehicle center and each headlamp axis.
- Clean lenses: Dust and haze flatten the cutoff—wipe both lamps before you start.
25 ft / 7.6 m Wall Method — Step by Step
- Turn on low beams. Cover one lamp with a towel to adjust the other precisely.
- Vertical aim: Use the vertical adjuster to place the cutoff right on (or slightly below) the lower tape line.
- Horizontal aim: Use the horizontal adjuster to align the bright step/inflection near each headlamp’s vertical axis line.
- Repeat for the other side, then uncover both and re-check symmetry against your center and axis lines.
- High-beam check: Switch to high beam briefly; the hotspot should land close to the vertical axis lines.
Fine-Tuning & Road Check
- Short drive test: If you get flashed by oncoming traffic, lower the cutoff slightly and recheck.
- Pattern clarity: Aim for a sharp cutoff with a bright, even foreground—avoid pointing too low (you’ll lose distance vision).
- Re-verify after a week: New lamps, mounts, or spring settles can change aim slightly.
Pro Tips (RHD/LHD, Lowered Cars, Adaptive Leveling)
- RHD/LHD optics: Ensure your VLAND lamps match your traffic side; cutoff “step” geometry differs.
- Lowered/raised vehicles: Re-aim after suspension changes. Lowering often increases glare unless corrected.
- Auto-level sensors: If equipped, make sure suspension height sensors are connected and calibrated.
- Load changes: Heavy cargo or towing affects aim—use leveling controls if your car has them.
- Fog lamps: Keep them low and wide; they’re not a substitute for mis-aimed low beams.
Common Mistakes to Avoid
- Skipping the second (lower) tape line — the 1% drop is what prevents glare.
- Aiming on a sloped driveway — even a small gradient throws off measurements.
- Adjusting both lamps at once — cover one side to avoid chasing the pattern.
- Dirty lenses — haze makes the cutoff fuzzy and hard to place accurately.
- Only checking in a garage — always do a quick road confirmation.
FAQs
Is the 1% rule “official” for VLAND headlights?
Can I aim at 5 m instead of 25 ft / 7.6 m?
My car is lowered—should I aim lower than 1%?
Do I need to re-aim after installing VLAND headlights?
Want the full E-mark / ECE context?
See our comprehensive VLAND E-mark guide to decode lens marks, DRL behavior, and inspection pitfalls—perfect alongside this aiming method.
Open the VLAND E-mark / ECE Guide© VLAND EU — Genuine VLAND products with clear, helpful guidance. More articles.
