This post is also available in other languages:
Content Reuse Policy
You may reproduce or adapt this content for educational or commercial use with proper attribution and a link to: the original blog post Include a visible credit near the reused content with a standard hyperlink to the source.
VLAND E-Mark (ECE) Lighting Guide — Decode Lens Marks, Aim Correctly, Avoid Glare
A practical VLAND guide to E-mark/ECE: decode lens codes, set a non-glare cutoff with the 1% rule, avoid inspection pitfalls, and download a printable checklist and aiming template.
VLAND E-Mark (ECE) Lighting Guide — Decode Lens Marks, Aim Correctly, Avoid Glare
This VLAND EU guide explains E-marking in plain language, shows you how to read your housing codes, and teaches a fast, reliable headlight aiming method so you get a crisp cutoff without glare. Download a printable checklist and aiming template below.
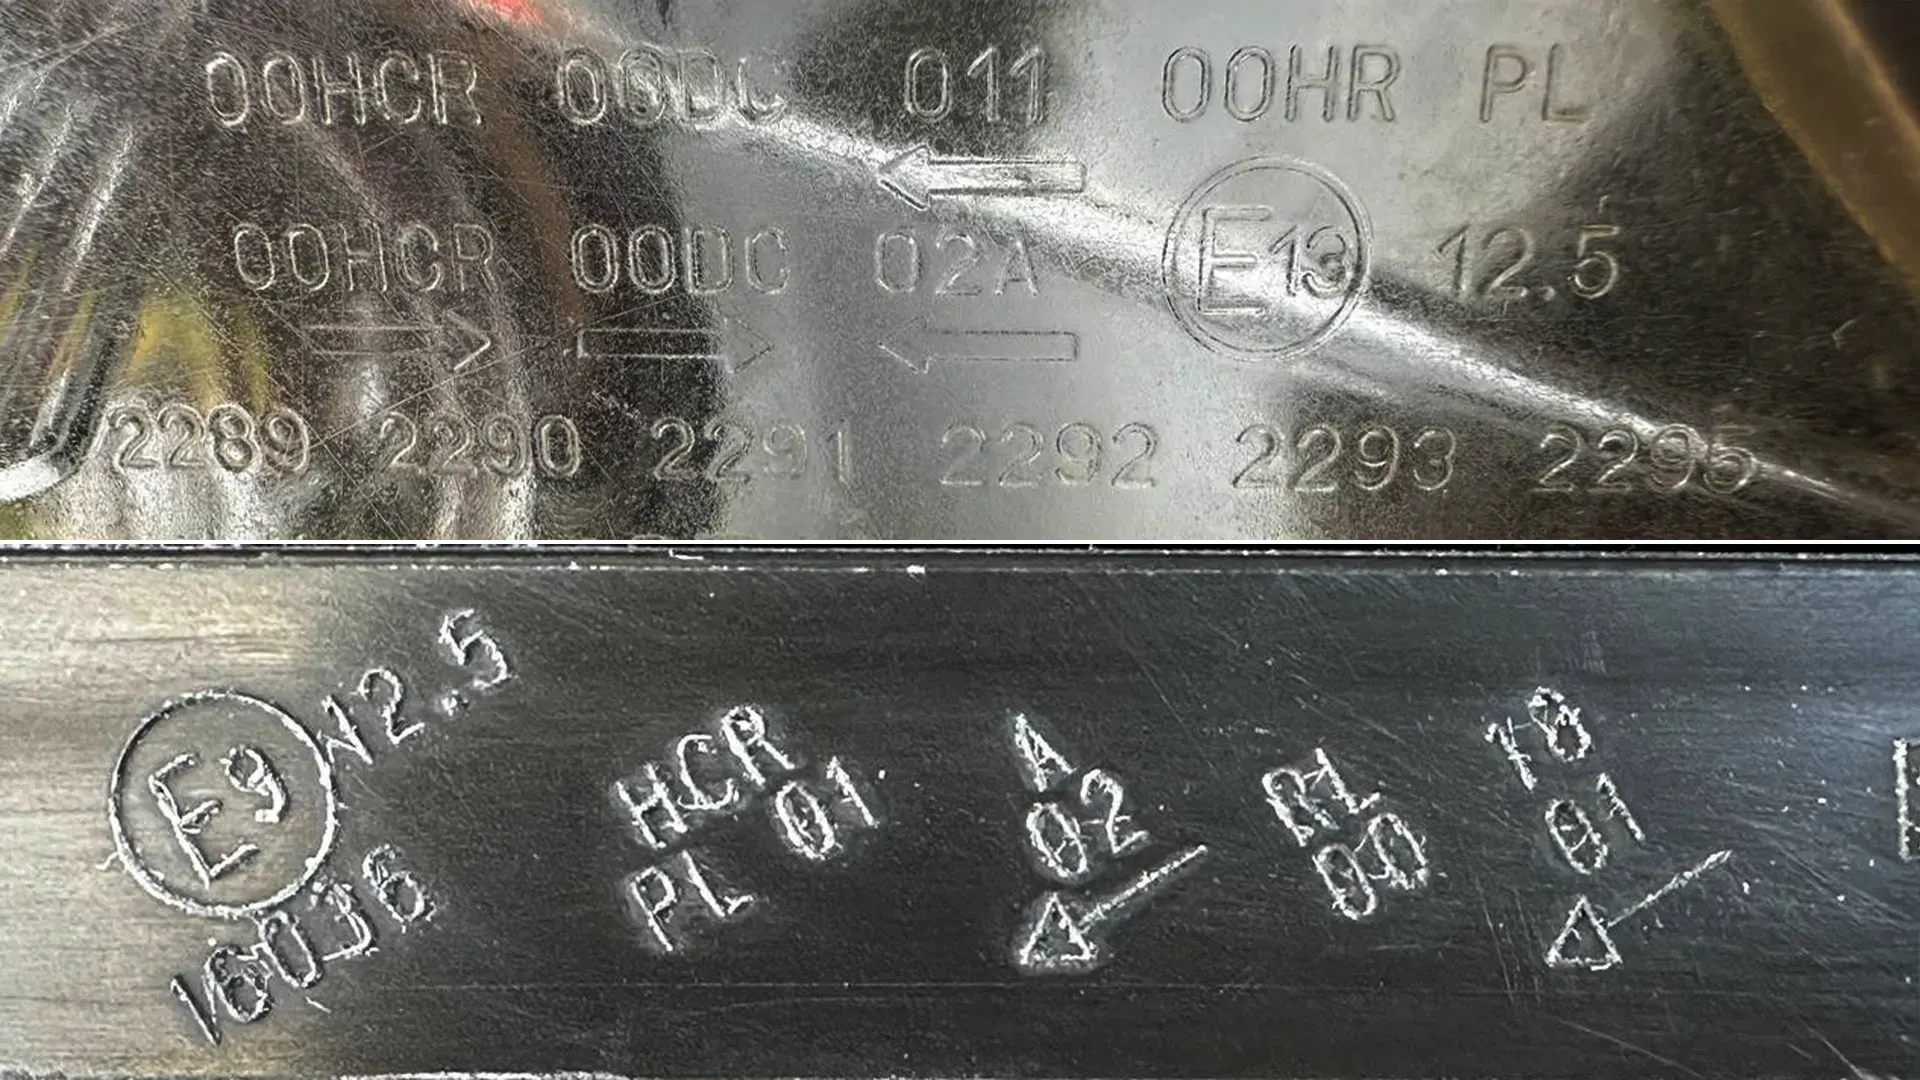
What the E-mark Means (VLAND Version)
The circled E plus a number shows a lamp (or a specific function on it) has been type-approved to a UNECE regulation by the authority identified by that number. Nearby letters tell you which functions are approved (low/high beam, DRL, position light), and numeric strings are approval IDs/series.
- E# = approval authority (for example, E9, E13).
- Function codes = what the lamp does and was tested for (e.g., HCR halogen combined low+high, DC HID low, RL DRL, A position).
- Reference number (e.g., 12.5) controls the total allowed main-beam intensity when multiple high beams are fitted.
Note: not every lamp carries every marking. If a product doesn’t list E-marking, simply use it as intended for your tuning project and check local expectations.
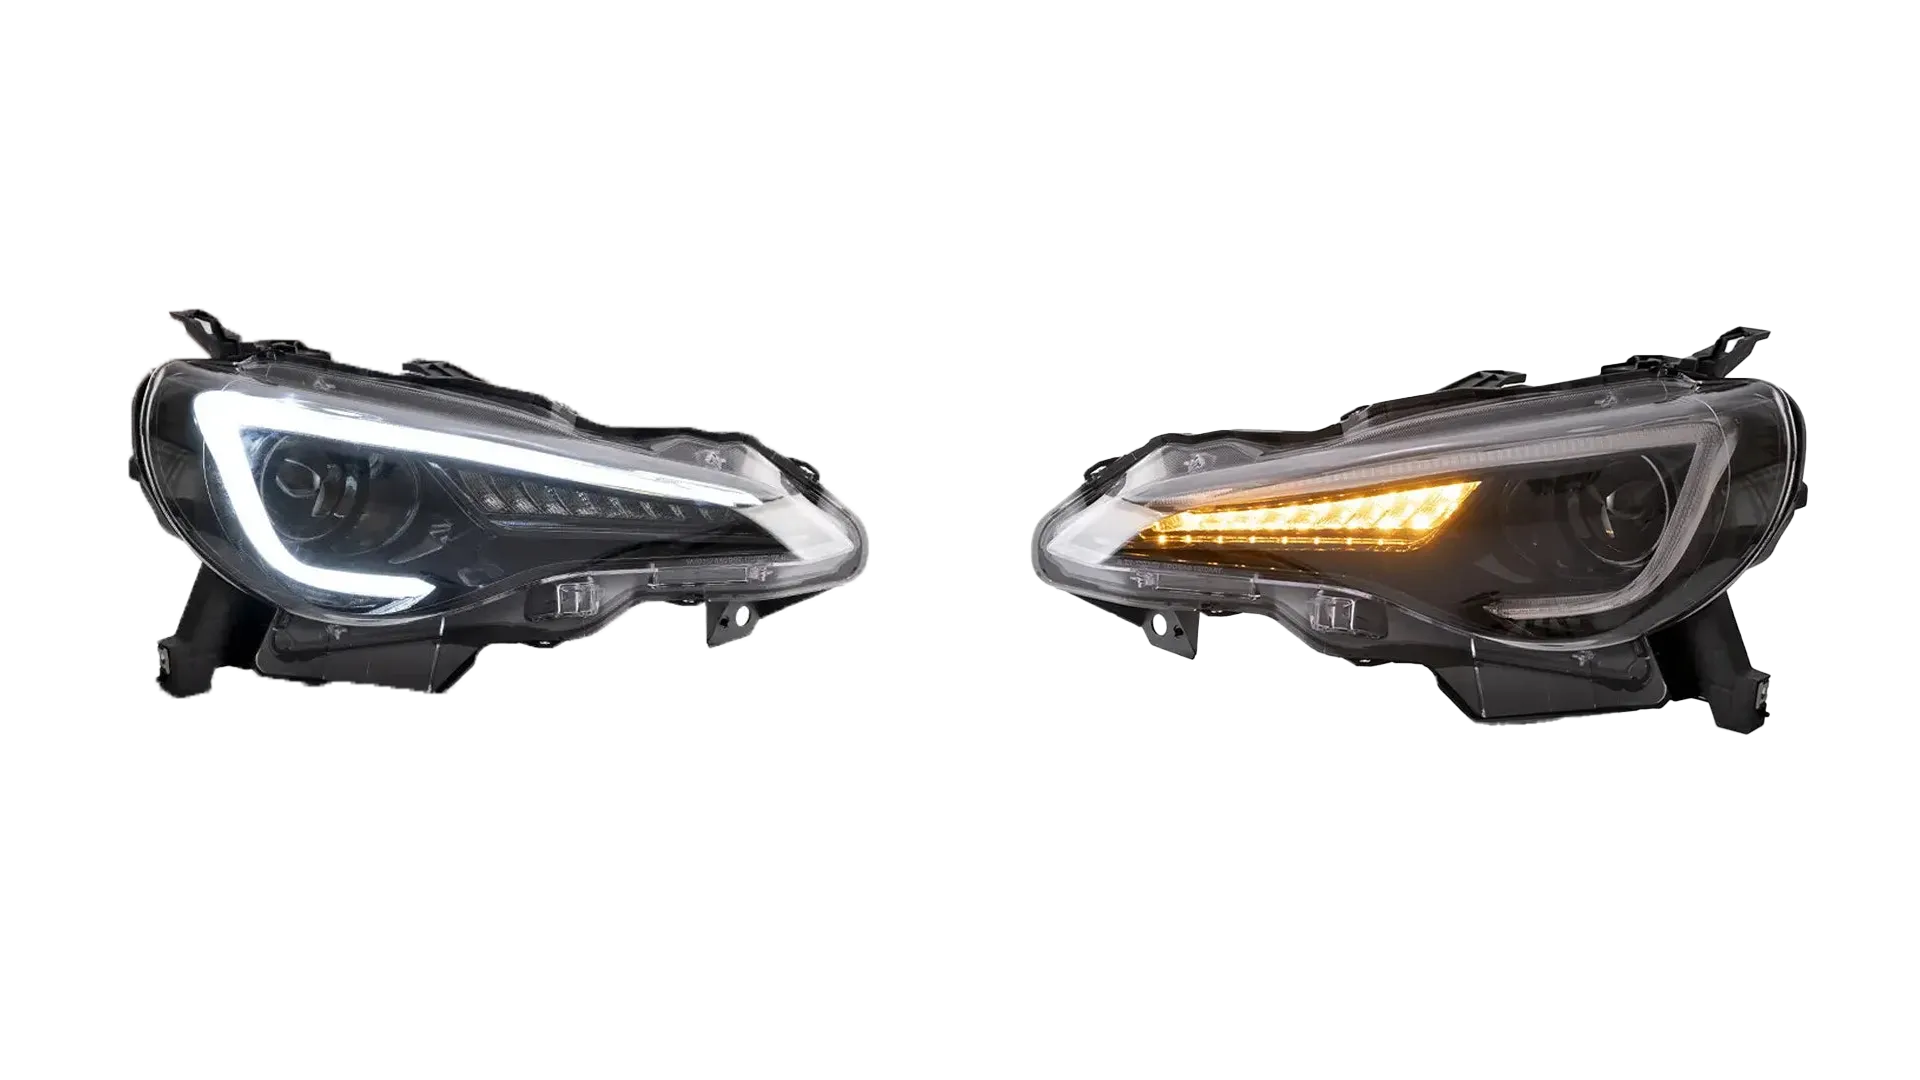
Function Codes — Quick Legend
- HCR — Halogen headlamp, combined low + high beam
- HC / HR — Halogen low / high beam
- DCR — HID, combined low + high beam
- DC / DR — HID low / high beam
- RL — Daytime running lamp
- A — Front position (parking) lamp
- PL — Plastic lens marking
- Reference number (e.g., 12.5) — caps total high-beam intensity across the vehicle
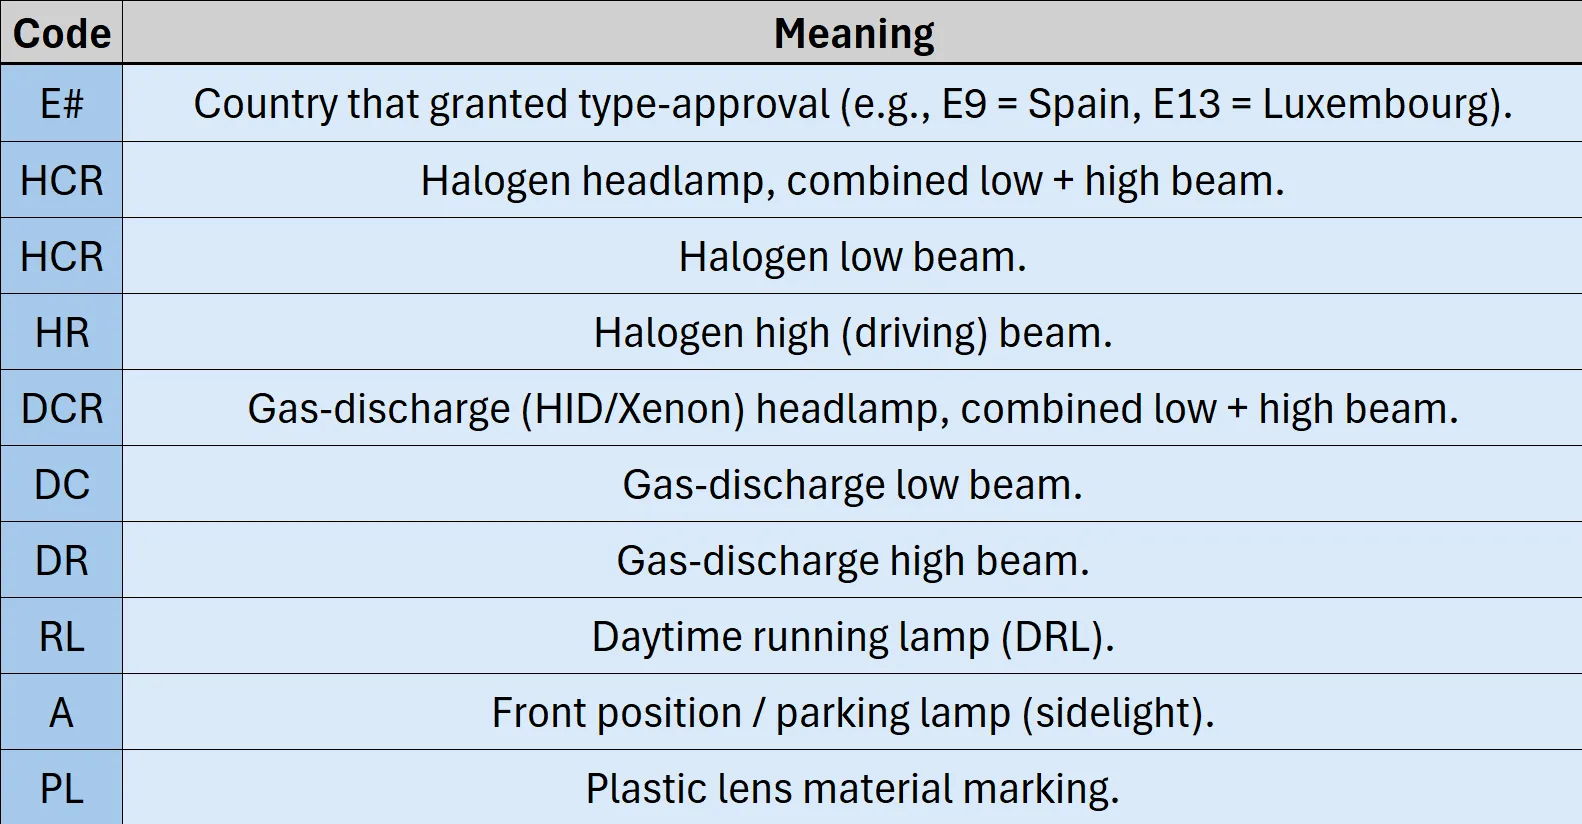
DRL + Indicator Interaction (Real VLAND Example)
Many setups dim or pause the DRL on the signalling side while the indicator flashes so the amber turn signal isn’t masked by a bright white DRL. Behavior varies by vehicle configuration, but the VLAND example below illustrates clean, easy-to-see signalling.
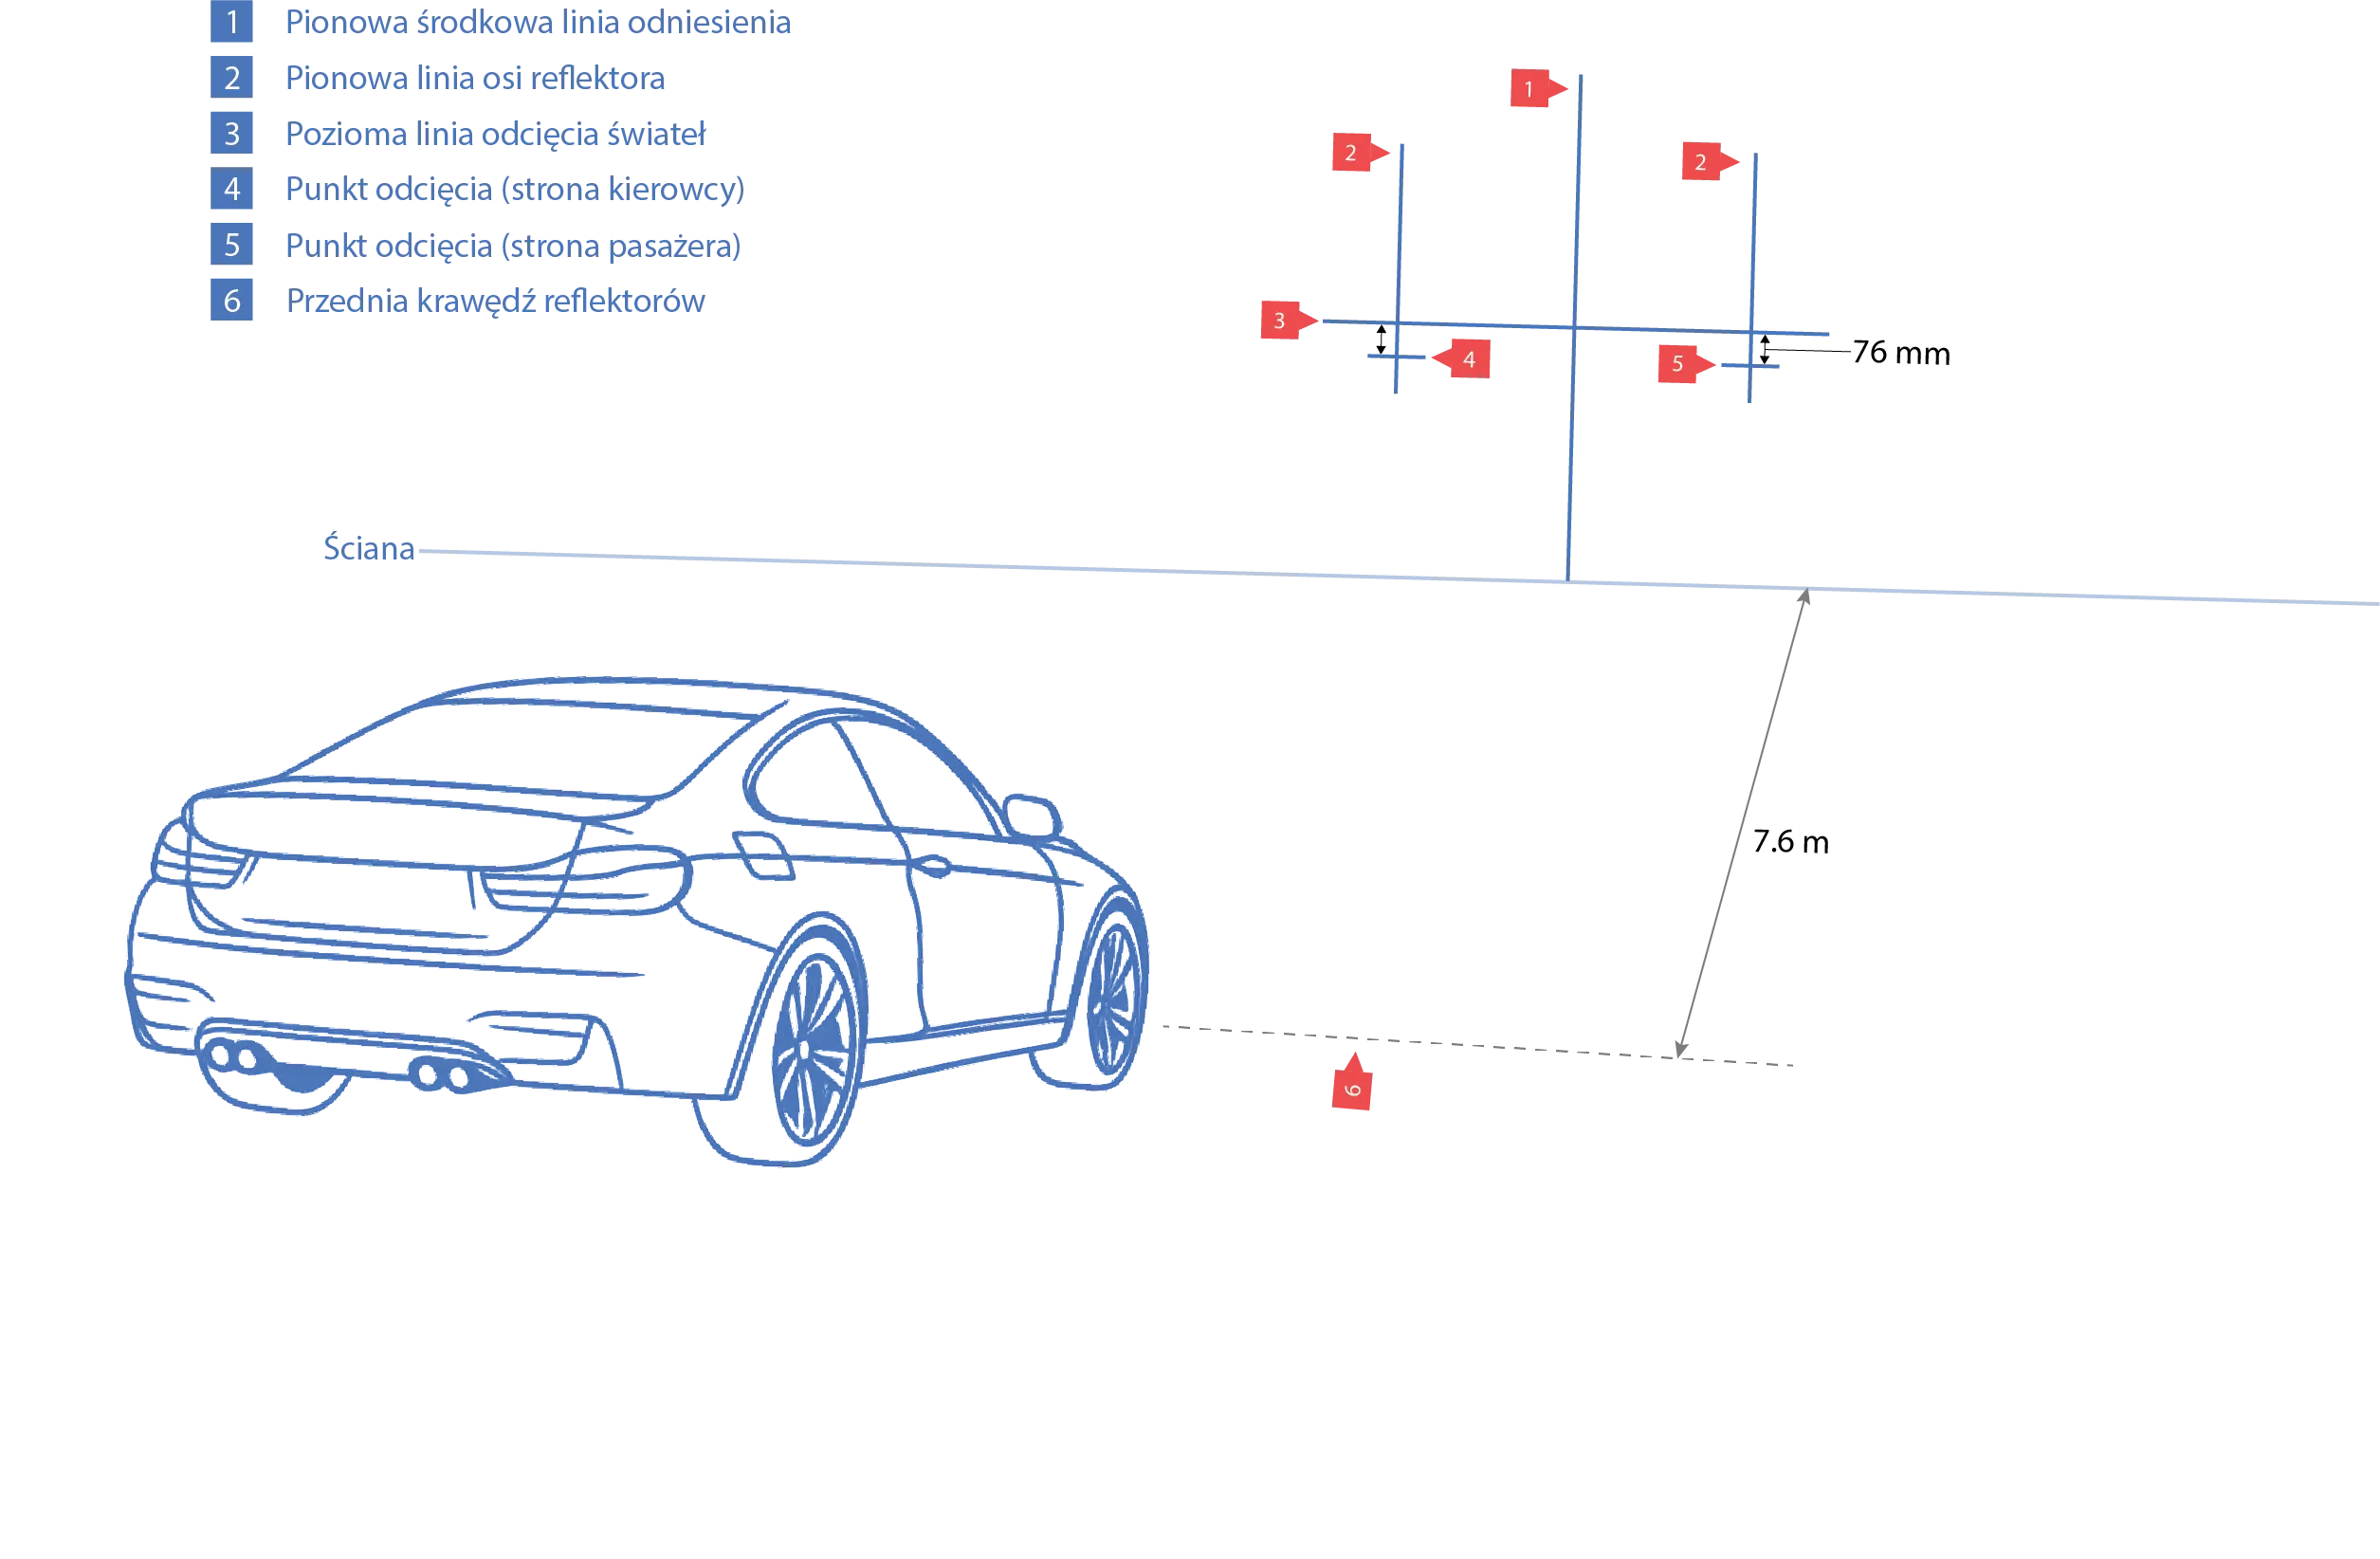
Aiming Basics — The VLAND 1% Rule You Can Trust
Measure the headlamp center height (H). At a distance D from a wall, aim the cutoff so it lands Δ = D × 1% below the H line.
- 3 m → 3 cm drop (≈ 1.2 in)
- 5 m → 5 cm drop (≈ 2.0 in)
- 7.6 m / 25 ft → 7.6 cm drop (≈ 3.0 in)
- 10 m → 10 cm drop (≈ 3.9 in)
Inspection stations use beam testers; this is a dependable pre-check to eliminate obvious glare.
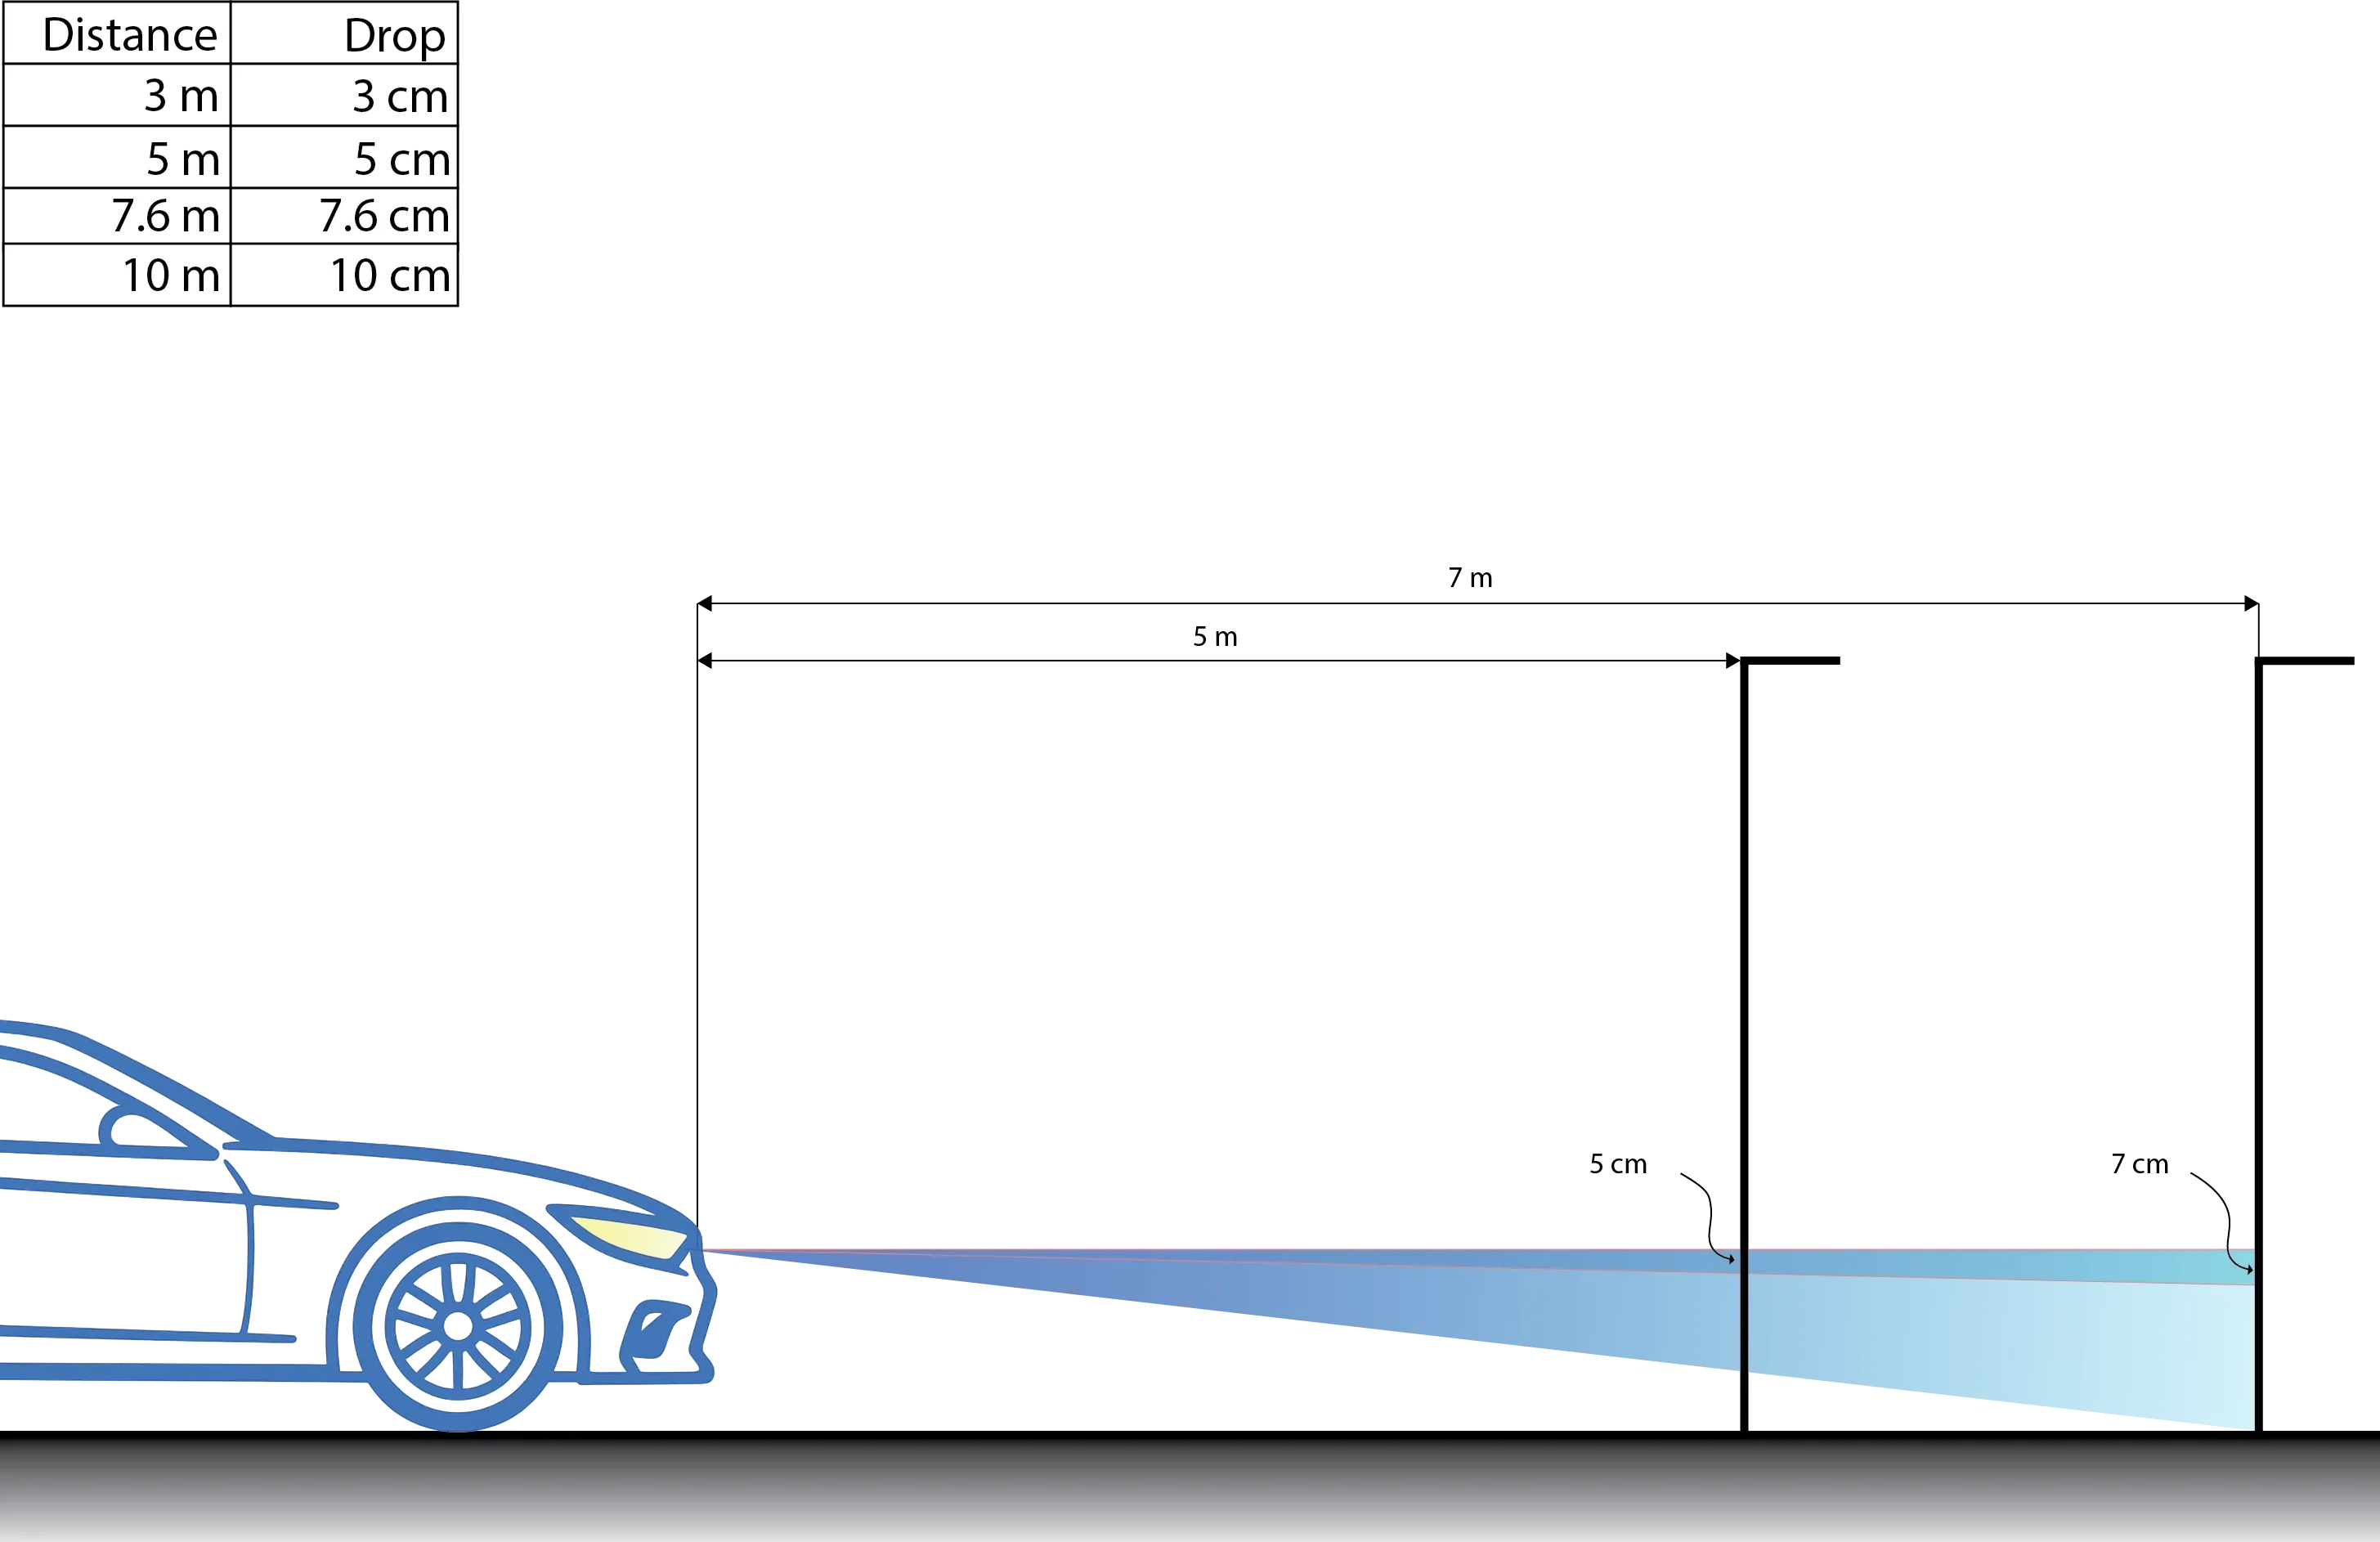
Driveway Wall Method — Step by Step
- Prep: level ground, normal tyre pressure/load, fuel at typical level.
- Distance: park 25 ft / 7.6 m from a flat wall.
- Measure H: ground → center of each low-beam projector.
- Tape the wall: one horizontal line at H; another 3 in / 7.6 cm below (1% drop at 25 ft). Mark vertical centre and each headlamp axis line.
- Adjust low beam: set the sharp cutoff at or just below the lower line; keep left/right symmetric on the axis lines.
- High-beam check: hotspot should sit near the vertical axis lines after low-beam aim is correct.
- Road test: if oncoming drivers flash you, lower slightly and recheck.
Mini Measurement Protocol — Honest Before/After
- Use a lux meter on a tripod in a dark area; fix the meter height and distance.
- Record a baseline with your current lamps after aiming; log peak lux near the cutoff and adjacent points for uniformity.
- Install and aim the new lamps; repeat readings at the exact same locations.
- Keep notes on ambient light and temperature; clean lenses between runs.
- Compare results at identical geometry — don’t cross-compare different distances.
Common Inspection Pitfalls (Quick Checks)
DRL behavior
On the signalling side, many setups dim or pause the DRL while the indicator flashes.
Indicator color/rate
Amber, roughly 90 ± 30 flashes/min. Hyper-flash usually means load/decoder issues.
Reverse & rear fog
Reverse is white; rear fog is red. Verify function after wiring changes.
Country Notes (Short & Neutral)
- Periodic inspections often use beam testers; DIY wall aim is a great pre-check, but the official result depends on the tester reading.
- DRL + indicator dimming/pausing on the signalling side is a common expectation to avoid masking.
- Verify left/right-traffic compatibility; optics can differ and are sometimes marked with small arrows or codes.
- Enforcement emphasis can vary by market and even by inspection centre (examples you’ll see around Europe include the UK, Germany, France, Poland, Italy, Lithuania).
Downloads — Print & Keep in Your Glovebox
VLAND Printable Lighting Checklist (PDF)
Tick-box sheet: find marks, verify functions, DRL behavior, indicator color/rate, reverse/rear fog, aim pre-check, condensation.
DownloadVLAND Headlight Aiming Template (PDF)
Scalable grid for 25 ft / 7.6 m and 5 m setups, with a 1% drop conversion mini-table.
DownloadVLAND ECE Code Decoder (PDF)
Quick reference: E# approval authority, RL (DRL), A (position), HC/HR/HCR (halogen), DC/DR/DCR (HID), PL (plastic lens), high-beam reference number.
DownloadGlossary
- E-mark — circled E + number; UNECE type-approval mark on the lens/housing.
- UNECE — UN body that publishes harmonized vehicle regulations.
- HCR / HC / HR — halogen combined / low / high beam codes.
- DCR / DC / DR — HID combined / low / high beam codes.
- RL — daytime running lamp; A — front position lamp; PL — plastic lens.
- Reference number — value used to cap total main-beam intensity.
- CANBUS — vehicle network; can trigger bulb-out/hyper-flash with LED swaps.
- Cutoff — sharp upper edge of the low-beam pattern you aim on a wall.
FAQs
Do VLAND lights have E-mark?
How do I know if my lamp is E-marked?
What’s a good DIY headlight aim?
My DRL and indicator clash — does that matter?
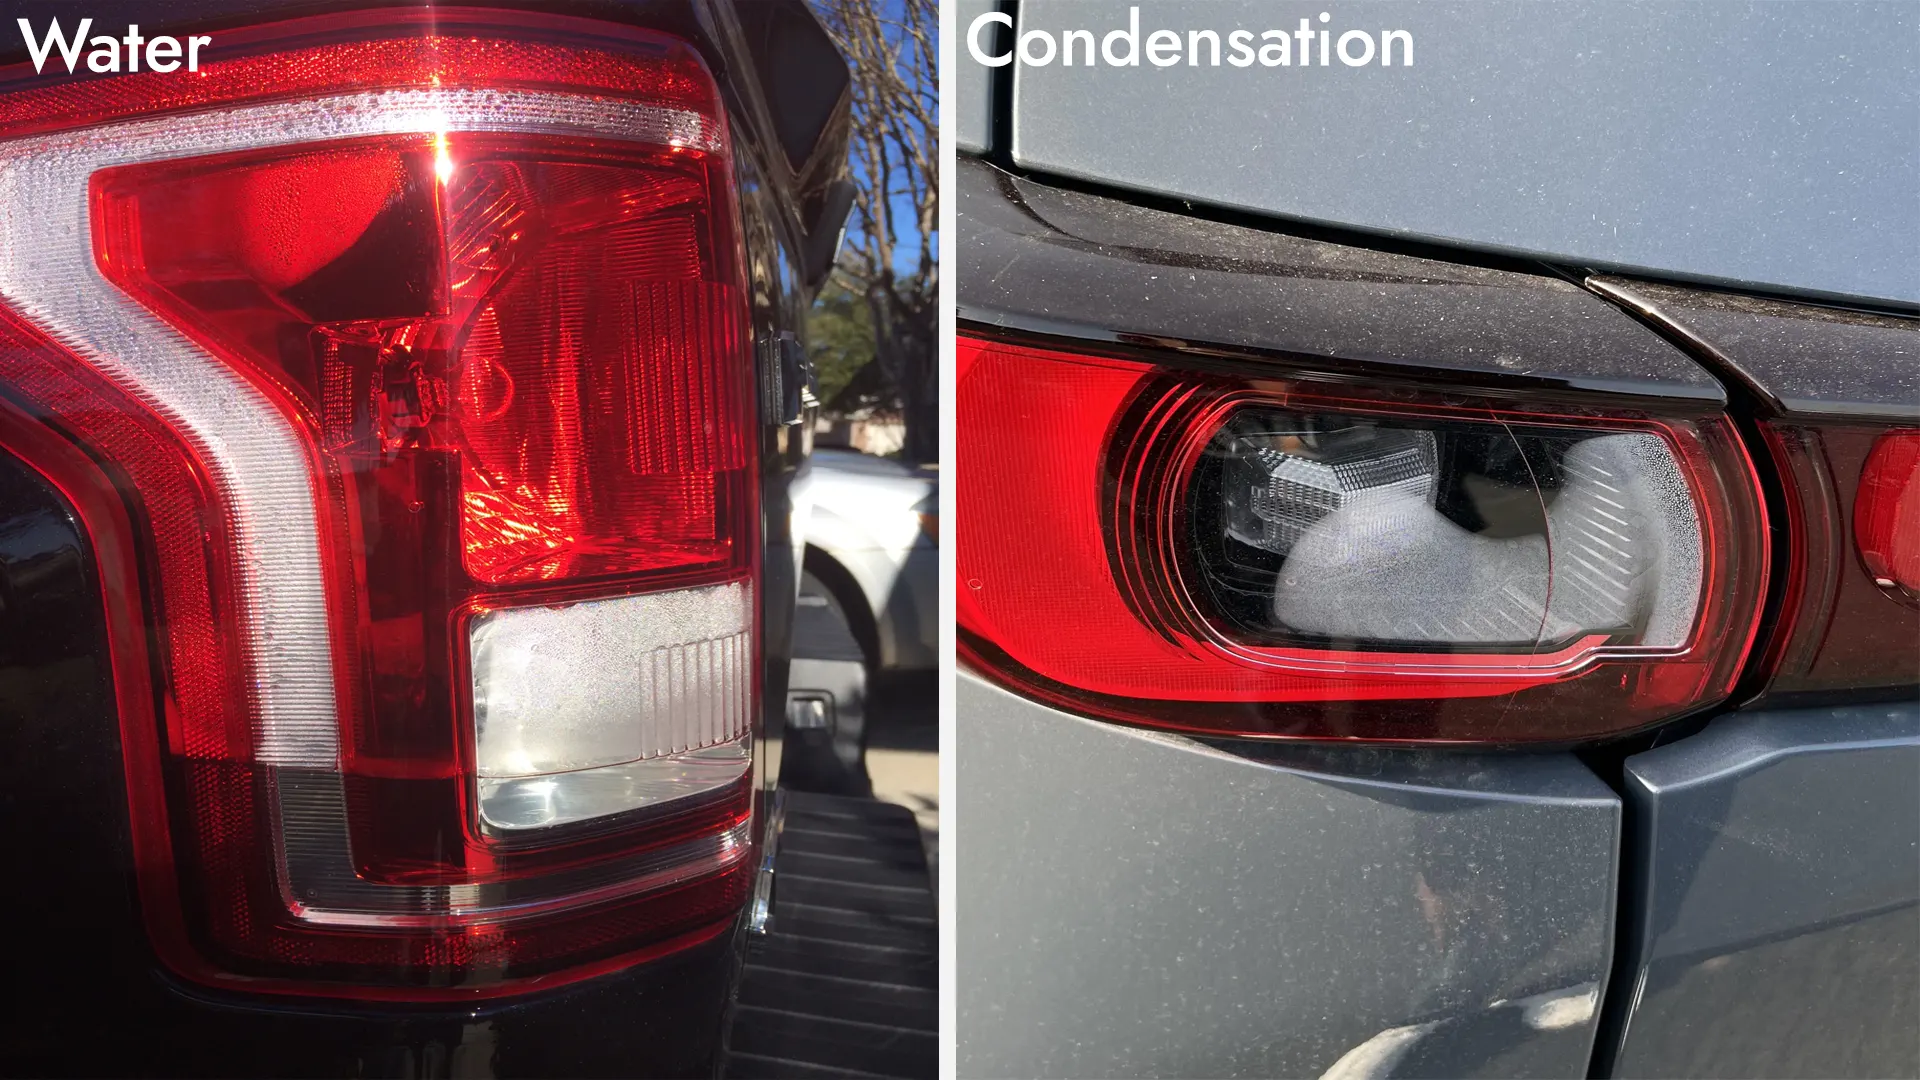
Is light misting inside the lens a defect?
I get a bulb-out message or hyper-flash — what now?
More Help from VLAND
© VLAND EU — Genuine VLAND products with clear, helpful guidance. More articles.
